Step-by-Step Guide to Installing Boat Engine Room Lights
Proper lighting in your boat’s engine room is not just a matter of convenience—it’s a matter of safety. Whether you’re performing routine maintenance, checking fluid levels, or addressing a sudden issue while out on the water, having a well-lit engine room makes every task easier and safer. Many boat owners are upgrading to modern LED lights because they are energy-efficient, long-lasting, and provide brighter illumination than traditional bulbs.
If you’re looking to improve your boat’s engine room lighting, this step-by-step guide will walk you through the entire process, from planning your setup to safely installing your lights.
Why Proper Engine Room Lighting Matters
Before diving into the steps, it’s important to understand why proper lighting is essential:
- Safety: A well-lit engine room helps you spot leaks, loose components, or wiring issues before they become serious problems.
- Efficiency: Bright lighting makes repairs and maintenance much faster and less frustrating.
- Longevity: Modern LED lights are designed to withstand vibration, moisture, and the harsh marine environment, making them ideal for engine rooms.
Now, let’s get started with the installation process.
Step 1: Plan Your Lighting Layout
The first step is to plan where your lights will go. Start by evaluating your engine room’s size and identifying key areas that need illumination, such as the engine block, battery compartments, bilge pumps, and wiring harnesses.
- Tip: Take measurements of your engine room and sketch a simple layout.
- Goal: Ensure that every critical area has adequate lighting without creating shadows.
Consider LED strip lights for general illumination and compact spotlights for focused lighting over specific components.
Step 2: Choose the Right Lights
When selecting engine room lights, opt for marine-grade LED fixtures. These are specifically designed for the challenging marine environment and offer benefits such as:
- Waterproof and corrosion-resistant housings to handle moisture and salt exposure.
- Shock and vibration resistance to withstand the movement of your boat.
- Low heat output to prevent overheating in tight spaces.
- Energy efficiency to reduce battery strain.
Look for lights with a high lumen output for bright illumination and a color temperature of around 5000K for clear visibility.
Step 3: Gather Your Tools and Materials
Before beginning installation, collect all the necessary tools and supplies:
- Marine-grade LED lights or strip lights
- Marine-grade electrical wire
- Waterproof connectors and heat-shrink tubing
- A power switch or control panel connection
- Drill and screws for mounting
- Wire cutters, strippers, and crimpers
- Zip ties and adhesive clips for cable management
Having everything ready beforehand will make the installation process smoother and more efficient.
Step 4: Disconnect Power
Safety is crucial when working with electrical components on a boat. Before handling any wiring, turn off your boat’s power supply at the battery switch. This will prevent accidental short circuits or shocks while installing your new lights.
Step 5: Install the Light Fixtures
Start mounting the fixtures in your planned locations:
- Use a drill to create pilot holes if needed, but be mindful of what’s behind each surface to avoid damaging wires or components.
- Secure the light fixtures using marine-grade screws or adhesive mounts.
- Ensure each light is positioned for maximum coverage and minimal shadows.
- For LED strips, use waterproof adhesive backing and clips to secure them along bulkheads or under overhead panels.
See also: The Secret Tech Inside Vehicle Anti Theft Devices
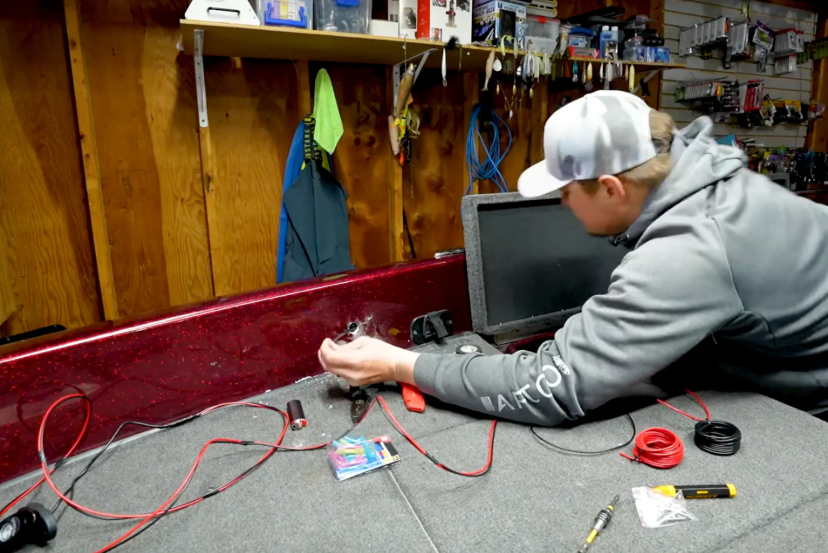
Step 6: Run the Wiring
Once the lights are mounted, run the electrical wires neatly through the engine room:
- Route wires along existing wiring harnesses or bulkheads.
- Use zip ties or adhesive clips to secure them in place.
- Avoid areas with sharp edges or high heat.
If your boat doesn’t already have a dedicated switch for engine room lighting, consider wiring the lights to your boat’s control panel or installing a separate toggle switch near the engine compartment.
Step 7: Make Electrical Connections
With the wires in place, it’s time to connect your lights to the power supply:
- Strip the wire ends and use crimp connectors to make secure connections.
- Protect each connection with heat-shrink tubing for waterproofing.
- Connect the positive and negative wires to your boat’s DC electrical system.
- Double-check that the polarity is correct to avoid damaging the lights.
Step 8: Test the Lights
Once everything is connected, restore power to your boat and test the new engine room lights. Turn the switch on and inspect each light to ensure it works properly. Check for even illumination and adjust any angles if necessary.
Step 9: Organize and Finalize
After confirming everything is working correctly, take time to tidy up:
- Bundle and secure excess wiring with zip ties.
- Label wires if needed for easy troubleshooting in the future.
- Ensure all fixtures are securely mounted and protected from moisture and vibration.
Maintenance Tips
To keep your engine room lights performing well, perform regular inspections:
- Wipe down light housings to remove dirt or grease.
- Check connections for signs of corrosion or wear.
- Replace any damaged fixtures promptly to maintain visibility.
Conclusion
Installing boat engine room lights may seem like a small upgrade, but it can significantly improve safety, convenience, and your ability to handle emergencies. By choosing high-quality marine-grade LED lights and following this step-by-step guide, you’ll create a well-lit workspace that makes every maintenance task easier and safer. With a little planning and attention to detail, your engine room can become a bright and functional part of your boat.


